 Photo by
 Secure servers with SaltStack and Vault (part 5)
In the final part of this series we’ll explore using Hashicorp Consul in combination with Vault.
Instead of Vault storing secrets in the filesystem, we’ll use the Consul storage backend. This backend is highly available, allowing us to tolerate server failures and filesystem problems. With multiple Consul servers we can lose and restart instances without fear of losing critical data in Vault.
With Consul we can also make use of Consul Template, a tool to create files using values stored in Consul and Vault.
Installing Consul
Create salt/consul/server.sls with the following:
{% set consul_version = '1.5.2'  %}

consul:
  archive.extracted:
    - name: /tmp/consul
    - enforce_toplevel: False
    - source: https://releases.hashicorp.com/consul/{{consul_version}}/consul_{{consul_version}}_linux_amd64.zip
    - source_hash: https://releases.hashicorp.com/consul/{{consul_version}}/consul_{{consul_version}}_SHA256SUMS
    - unless: test -f /usr/local/bin/consul
  file.managed:
    - name: /usr/local/bin/consul
    - source: /tmp/consul/consul
    - mode: 0755
    - unless: test -f /usr/local/bin/consul
    - require:
      - archive: consul
  group.present:
    - name: consul
  user.present:
    - name: consul
    - fullname: Hashicorp Consul
    - shell: /usr/bin/nologin
    - groups:
        - consul

consul_data_dir:
  file.directory:
    - name: /var/consul
    - user: consul
    - group: consul
    - mode: 0750

consul_config:
  file.managed:
    - name: /etc/consul.json
    - source: salt://consul/config.json
    - user: consul
    - group: consul
    - mode: 0640

consul_service:
  file.managed:
    - name: /etc/systemd/system/consul.service
    - source: salt://consul/consul.service
  service.running:
    - name: consul
    - enable: True
    - require:
      - file: consul
      - file: consul_config
      - file: consul_service
    - watch:
      - file: consul
      - file: consul_service
      - file: consul_config
And the accompanying files:
salt/consul/consul.service:
[Unit]
Description=Consul
Wants=network.target
After=network.target

[Service]
Environment="GOMAXPROCS=2"
ExecStart=/usr/local/bin/consul agent -config-file=/etc/consul.json
ExecReload=/bin/kill -HUP $MAINPID
KillSignal=TERM
User=consul
Group=consul

[Install]
WantedBy=multi-user.target
salt/consul/consul.json:
{
  "server": true,
  "bootstrap_expect": 1,
  "ui": true,
  "bind_addr": "127.0.0.1",
  "data_dir": "/var/consul",
  "enable_debug": false,
  "log_level": "info"
}
This will install Consul and configure it to run as a system service.
Run the state with salt-call and check it’s running:
sudo salt-call state.sls consul.server

consul members
# Node     Address         Status  Type    Build  Protocol  DC   Segment
# stretch  127.0.0.1:8301  alive   server  1.5.2  2         dc1  <all>
You can see a single node running as a server.
Store some test data in Consul then read it back again.
consul kv put quality_level 10
# Success! Data written to: quality_level
consul kv get quality_level
# 10Serve Consul over HTTPS
We’ve got a basic Consul server running which is completely open. To be a secure place to store Vault data, it should:
- Be locked down with the Consul ACL system
- Use TLS for agent communication, only allowing agents with valid certificates to join the cluster
The Consul Security Model is a good reference to fully understand what’s involved.
This is overkill for our single-node cluster however, so for now we’ll configure the Consul API to only be available over HTTPS, using a certificate signed by the internal CA we created in part 4.
Update salt/consul/server.sls:
+ consul_ssl_key:
+   x509.private_key_managed:
+     - name: /etc/pki/consul.key
+     - bits: 4096
+     - user: consul
+     - group: consul
+     - mode: 0700
+
+ consul_ssl_cert:
+   x509.certificate_managed:
+     - name: /etc/pki/consul.crt
+     - public_key: /etc/pki/consul.key
+     - signing_cert: /etc/pki/root.crt
+     - signing_private_key: /etc/pki/root.key
+     - CN: 'consul.local'
+     - subjectAltName: 'IP:127.0.0.1'
+     - user: consul
+     - group: consul
+     - mode: 0400
+     - append_certs:
+         - /etc/pki/root.crt
+     - require:
+       - x509: consul_ssl_key

  consul_service:
    file.managed:
      - name: /etc/systemd/system/consul.service
      - source: salt://consul/consul.service
    service.running:
      - name: consul
      - enable: True
      - require:
        - file: consul
        - file: consul_config
        - file: consul_service
+       - x509: consul_ssl_cert
      - watch:
        - file: consul
        - file: consul_service
        - file: consul_config
+       - x509: consul_ssl_cert
And update salt/consul/config.json:
  {
    "server": true,
+   "ports": {
+     "http": -1,
+     "https": 8501
+   },
+   "cert_file": "/etc/pki/consul.crt",
+   "key_file": "/etc/pki/consul.key",
    "bootstrap_expect": 1,
Here we tell Consul to not serve traffic over HTTP by setting the port to -1, and to serve HTTPS on port 8501.
Run the salt state again and check consul is accepting HTTPS traffic only.
Note that we need to update CONSUL_HTTP_ADDR so the cli can access consul now.
salt-call state.sls consul.server

consul members
# Error retrieving members: Get http://127.0.0.1:8500/v1/agent/members?segment=_all: dial tcp 127.0.0.1:8500: connect: connection refused
export CONSUL_HTTP_ADDR=https://127.0.0.1:8501
consul members
# Node     Address         Status  Type    Build  Protocol  DC   Segment
# stretch  127.0.0.1:8301  alive   server  1.5.2  2         dc1  <all>
Storing Vault data in Consul
With Consul installed and serving requests over HTTPS, let’s update salt/vault/vault.hcl to configure Vault to use Consul:
- storage "file" {
-   path = "/var/vault/data"
+ storage "consul" {
+   address = "127.0.0.1:8501"
+   path    = "vault"
  }
Provision Vault again:
sudo salt-call state.sls vault.install
The state will run systemctl reload vault because the configuration changed.
Unfortunately at the time of writing Vault can’t dynamically change storage medium with a simple reload.
Let’s assume we’re provisioning Vault again from scratch; we won’t attempt to migrate the old file storage. Run the following to restart Vault, unseal it, and get it to where we were at the end of part 4:
sudo systemctl restart vault
sudo journalctl -fu vault # optional - watch vault as it restarts
vault status
# server not yet initialized

# if not initialized
vault operator init -key-shares=3 -key-threshold=2

# run twice for key-threshold=2
vault operator unseal
vault operator unseal

# authenticate with vault
export VAULT_TOKEN=<root-token> # created by `vault operator init`

# add saltstack policies
vault policy write salt-master salt-master.hcl
vault policy write saltstack/minions salt-minions.hcl

# Update /etc/salt/master.d/vault.conf with a new salt-master token, and make sure the URL is https
vault token create -policy=salt-master
cat /etc/salt/master.d/vault.conf
# vault:
#   url: https://127.0.0.1:8200
#   auth:
#     method: token
#     token: <generated_token>

# Restart Salt after any changes
sudo systemctl restart salt-master
Refer to earlier posts in the series if you get stuck.
Test a simple read and write using both the Vault cli and Salt:
vault write secret/password value=hunter2
vault read secret/password
# Key                 Value
# ---                 -----
# refresh_interval    768h
# value               hunter2

salt-call vault.read_secret secret/password value
# local:
#     hunter2
Consul UI
Let’s verify Vault is writing to Consul by browsing Consul’s UI.
Run this SSH command on your host machine (not the vagrant box), in the same directory as the Vagrantfile, to forward Consul’s port:
ssh vagrant@127.0.0.1 -p 2222 -i .vagrant/machines/default/virtualbox/private_key -L 8501:localhost:8501Note the -L flag to forward port 8501.
Port 2222 is forwarded by vagrant to give SSH access to the machine, and is how vagrant ssh works behind the scenes.
Port 2222 may not have been forwarded if you have other vagrant machines running.
Visit https://localhost:8501 in a browser on your host machine. You’ll see the Consul certificate signed by the internal CA (but not trusted by the host machine):

Ignore the certificate warning and you’ll be greeted with a Consul UI page.
Navigate to Key/Value in the menu to see our Vault storage and quality_level key from earlier:
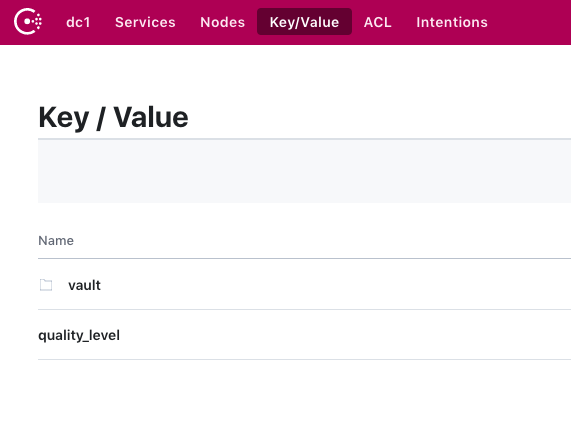
Great! Vault is successfully using Consul to store its data.
Consul Template
Consul Template is another Hashicorp tool that creates files using templates populated with data stored in Consul and Vault.
For our example, let’s imagine we have an app that is configured with the file /etc/app.yaml.
It needs quality_level stored in Consul and password stored in Vault.
Create salt/consul/template.sls:
{% set version = '0.20.0' %}

consul_template:
  archive.extracted:
    - name: /tmp/consul-template
    - enforce_toplevel: False
    - source: https://releases.hashicorp.com/consul-template/{{version}}/consul-template_{{version}}_linux_amd64.zip
    - source_hash: https://releases.hashicorp.com/consul-template/{{version}}/consul-template_{{version}}_SHA256SUMS
    - unless: test -f /usr/local/bin/consul-template
  file.managed:
    - name: /usr/local/bin/consul-template
    - source: /tmp/consul-template/consul-template
    - mode: 0755
    - unless: test -f /usr/local/bin/consul-template
    - require:
      - archive: consul_template

consul_template_config:
  file.managed:
    - name: /etc/consul-template.hcl
    - source: salt://consul/consul-template.hcl

consul_template_app_template:
  file.managed:
    - name: /etc/app.yaml.tpl
    - source: salt://consul/app.yaml.tpl

consul_template_service:
  file.managed:
    - name: /etc/systemd/system/consul-template.service
    - source: salt://consul/consul-template.service
  service.running:
    - name: consul-template
    - enable: True
    - require:
      - file: consul_template
      - file: consul_template_config
      - file: consul_template_app_template
      - file: consul_template_service
    - watch:
      - file: consul_template
      - file: consul_template_config
      - file: consul_template_app_template
      - file: consul_template_service
And the accompanying files:
salt/consul/consul-template.hcl:
consul {
  address = "127.0.0.1:8501"
  ssl {
    enabled = true
  }
}

template {
  source = "/etc/app.yaml.tpl"
  destination = "/etc/app.yaml"
  error_on_missing_key = true
  wait {
    min = "2s"
    max = "10s"
  }
}salt/consul/consul-template.service:
[Unit]
Description=Consul Template
Wants=network.target
After=network.target

[Service]
ExecStart=/usr/local/bin/consul-template -config=/etc/consul-template.hcl
ExecReload=/bin/kill -HUP $MAINPID
KillSignal=TERM
User=root
Group=root
TimeoutSec=5

[Install]
WantedBy=multi-user.targetsalt/consul/app.yaml.tpl:
app:
    quality_level: {{key "quality_level"}}
Here we download the consul-template binary and configure it to run as a system service.
In /etc/consul-template.hcl we tell it to connect to Consul with SSL, and add a template stanza telling it to create /etc/app.yaml using the template at /etc/app.yaml.tpl.
Run the salt state and check it works:
salt-call state.sls consul.template
cat /etc/app.yaml
# app:
#     quality_level: 10
Great! We’ve created /etc/app.yaml using values stored in Consul.
Accessing Vault with Consul Template
Consul Template can read credentials from Vault too.
Update salt/consul/app.yaml.tpl:
  app:
      quality_level: {{key "quality_level"}}
+     password: {{ with secret "secret/password" }}{{ .Data.value }}{{ end }}
We need to give Consul Template access to Vault.
Update salt/consul/consul-template.hcl:
  }

+ vault {
+   address = "https://127.0.0.1:8200"
+   vault_agent_token_file = "/tmp/vault-token"
+ }
+
  template {
Consul template will need a Vault token, which unfortunately can’t be easily generated with Salt.
The tokens granted to minions have limited permissions so can’t create tokens themselves.
Instead, create /tmp/vault-token using the Vault cli:
vault token create -policy read-only -file token > /tmp/vault-tokenRun the salt state again and check it works:
salt-call state.sls consul.template
cat /etc/app.yaml
# app:
#     quality_level: 10
#     password: hunter2
Excellent! We’ve now got secrets from Vault in the configuration file too.
Live configuration updates
With Consul running as a system service, any updates we make to quality_level in Consul and password in Vault will be reflected in /etc/app.yaml.
Let’s improve the password, upping the quality of our app significantly:
vault write secret/password value=much_better_password
consul kv put quality_level 100
cat /etc/app.yaml
# app:
#     quality_level: 100
#     password: hunter2
It updated for Consul, but not Vault. Why?
Unlike Consul, Vault doesn’t support blocking queries. We can’t hold a connection open with Vault, asking “let me know as soon as something changes”. Instead, Consul Template will wait until 50% of the secret’s lease duration has expired, then fetch it again.
Looking at the lifetime of secret/password, we can see it won’t expire for a while:
vault read secret/password
# Key                 Value
# ---                 -----
# refresh_interval    768h
# value               much_better_password
768 hours is a long time! Let’s shorten that to 10 seconds for the sake of this demo and restart Consul Template.
vault write secret/password value=much_better_password ttl=10s
systemctl restart consul-template
cat /etc/app.yaml
# app:
#     quality_level: 100
#     password: much_better_password

vault write secret/password value=even_better_password ttl=10s
# wait around 5 seconds
cat /etc/app.yaml
# app:
#     quality_level: 100
#     password: even_better_password
Conclusion and next steps
That concludes the end of this series, thanks for reading! I hope the 5 articles have given you the building blocks to build a secure Vault deployment with SaltStack.
There is a lot more to a full production deployment however. You may want to:
- Run a highly available Consul cluster secured with ACLs and TLS between agents
- Make Vault itself highly available over multiple machines
- Write more granular policies
- Handle backups of Consul
- Write custom Salt modules to remove all the manual steps in provisioning and creating tokens
- Configure other Vault secret backends to protect your infrastructure.
Do you need help with your Vault deployment, or perhaps SaltStack tips and advice? Feel free to reach out to me personally at glynn@backbeat.tech, or on Backbeat’s Twitter account @backbeat_tech.
